By Dan Beard
The art of tying knots is an almost necessary adjunct to not a few recreations. Especially is this true of summer sports, many of which are nautical, or in some manner connected with the water.
Any boy who has been aboard a yacht or a sail-boat, must have realized that the safety of the vessel and all aboard may be imperiled by ignorance or negligence in the tying of a knot or fastening of a rope. With some, the knack of tying a good, strong knot in a heavy rope, or light cord, seems to be a natural gift; it is certainly a very convenient accomplishment, and one that with practice and a little perseverance may be acquired even by those who at first make the most awkward and bungling attempts.
A bulky, cumbersome knot is not only ungainly, but is generally insecure.
As a rule, the strength of a knot is in direct proportion to its neat and handsome appearance.
To my mind, it is as necessary that the archer should know how to make the proper loops at the end of his bow-string, as it is that a hunter should understand how to load his gun.
Every fisherman should be able to join two lines neatly and securely, and should know the best and most expeditious method of attaching an extra hook or fly; and any boy who rigs up a hammock or swing with a "granny," or other insecure knot, deserves the ugly tumble and sore bones that are more than liable to result from his ignorance.
A knot, nautically speaking, is a "bend " that is more permanent than a "hitch." A knot properly tied never slips, nor does it jam so that it cannot be readily untied. A "hitch" might be termed a temporary bend, as it is seldom relied upon for permanent service. The "hitch" is so made that it can be cast off, or unfastened, more quickly than a knot.
It is impossible for the brightest boy to learn to make "knots, bends, and hitches" by simply reading over a description of the methods; for, although he may understand them at the time, five minutes after reading the article the process will have escaped his memory; but if he take a piece of cord or rope, and sit down with the diagrams in front of him, he will find little difficulty in managing the most complicated knots; and he will not only acquire an accomplishment from which he can derive infinite amusement for himself and a means of entertainment for others, but the knowledge gained may, in case of accident by fire or flood, be the means of saving both life and property.

Fig. 57.
Fisherman's Knots
The accompanying diagrams show a number of useful and important bends, splices, etc. To simplify matters, let us commence with Fig. 57 (above), and go through the diagrams in the order in which they come:
The "English," or "common single fisherman's knot " (Fig. 57, I.), is neat and strong enough for any ordinary strain. The diagram shows the knots before being tightened and drawn together.
When exceptional strength is required it can be obtained by joining the lines in the ordinary single fisherman's knot (Fig. 57, I.), and pulling each of the half knots as tight as possible, then drawing them within an eighth of an inch of each other and wrapping between with fine gut that has been previously softened in water, or with light-colored silk.
An additional line, or a sinker may be attached by tying a knot in the end of the extra line, and inserting it between the parts of the single fisherman's knot before they arc drawn together and tightened.
The "fisherman's double half knot," Fig. 57 (II. and III.). After the gut has been passed around the main line and through itself, it is passed around the line once more and through then same loop again, and drawn close.
Fig. 57 (IV., V. and IX.). Here are three methods of joining the ends of two lines together; the diagrams explain them much better than words can. Take a piece of string, try each one, and test their relative strength.
Fig. 57 (VI.). It often happens, while fishing, that a hook is caught in a snag, or by some other means lost. The diagram shows the most expeditious manner of attaching another hook by what is known as the "sinker hitch," described further on (Fig. 57, D, D, D, and Fig. 58, XIV., XV., and XVI.).
Fig. 57, VII. is another and more secure method of attaching a hook by knitting the line on with a succession of hitches.
How To Make a Horse-Hair Watch-Guard.
The same hitches are used in the manufacture of horse-hair watch-guards, much in vogue with the boys in some sections of the country. As regularly as "kite-time," "top-time," or ball-time," comes "horse-hair watch-guard time."
About once a year the rage for making watch-guards used to seize the boys of our school, and by some means or other almost every boy would have a supply of horse-hair on hand. With the first tap of the bell for recess, some fifty hands would dive into the mysterious depths of about fifty pockets, and before the bell had stopped ringing about fifty watch-guards, in a more or less incomplete state, would be produced.
Whenever a teamster's unlucky stars caused him to stop near the school-house, a chorus of voices greeted him with "Mister, please let us have some hair from your horses' tails."
The request was at first seldom refused, possibly because its nature was not at the time properly understood; but lucky was the boy considered who succeeded in pulling a supply of hair from the horses' tails without being interrupted by the heels of the animals or by the teamster, who, when he saw the swarm of boys tugging at his horses' tails, generally repented his first good-natured assent, and with a gruff "Get out, you young rascals!" sent the lads scampering to the school-yard fence.
Select a lot of long hair of the color desired; make it into a switch about the eighth of an inch thick by tying one end in a simple knot. Pick out a good, long hair and tie it around the switch close to the knotted end; then take the free end of the single hair in your right hand and pass it under the switch on one side, thus forming a loop through which the end of the hair must pass after it is brought up and over from the other side of the switch. Draw the knot tight by pulling the free end of the hair as shown by Fig.57,VII. Every time this operation is repeated a wrap and a knot is produced. The knots follow each other in a spiral around the switch, giving it a very pretty, ornamented appearance. When one hair is used up select another, and commence knitting with it as you did with the first, being careful to cover and conceal the short end of the first hair, and to make the knots on the second commence where the former stop. A guard made of white horse-hair looks as if it might be composed of spun glass, and produces a very odd and pretty effect. A black one is very genteel in appearance.
Miscellaneous.
Fig. 57, VIII. shows a simple and expeditious manner of attaching a trolling hook to a fish-line.
Fig. 57, F. is a hitch used on shipboard, or wherever lines and cables are used. It is called the Blackwall hitch.
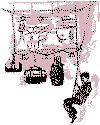
Fig. 57, E. is a fire-escape made of a double bowline knot, useful as a-sling for hoisting persons up or letting them down from any high place; the window of a burning building, for instance. Fig. 58, XVIII., XIX. and XX. show how this knot is made. It is described below.
Fig. 57, A. is a " bale hitch," made of a loop of rope. To make it, take a piece of rope that has its two ends joined; lay the rope down and place the bale on it ; bring the loop opposite you up, on that side of the bale, and the loop in front up, on the side of the bale next to you ; thrust the latter loop under and through the first and attach the hoisting rope. The heavier the object to be lifted, the tighter the hitch becomes.
An excellent substitute for a shawl-strap can be made of a cord by using the bale hitch, the loop at the top being a first-rate handle.
Fig. 57, B. is called a cask sling, and C (Fig. 57) is called butt sling. The manner of making these last two and their use may be seen by referring to the illustration. It will be notice that a line is attached to the bale hitch in a peculiar manner (a Fig. 57). This is called the " anchor bend." If while aboard a sail-boat you have occasion to throw a bucket over for water, you will find the anchor bend a very convenient and safe way to attach a line to the bucket handle.

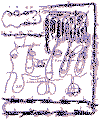
Fig. 58.
Knots & Splices
Fig. 58, I and II. are loops showing the elements of the simplest knots.
Fig. 58, III. is a simple knot commenced.
Fig. 58, IV. shows the simple knot tightened.
Fig. 58, V. and VI. show how the Flemish knot looks when commenced and finished.
Fig. 58, VII. and VIII. show a " rope knot " commenced and finished.
Fig. 58, IX. is a double knot commenced.
Fig. 58, X. is the same completed.
Fig. 58, XI. shows a back view of the double knot.
Fig. 58, XII. is the first loop of a "bowline knot." One end of the line is supposed to be made fast to some object. After the turn or loop (Fig. 58, XII.) is made, hold it in position with your left hand and pass the end of the line up through the loop or turn you have just made, behind and over the line above, then down through the loop again, as shown in the diagram (Fig. 58, XIII.) ; pull it tight and the knot is complete.
The "sinker hitch" is a very handy one to know, and the variety of uses it may be put to will be at once suggested by the diagrams.
Lines that have both ends made fast may have weights attached to them by means of the sinker hitch (Fig. 57, D, D, D).
To accomplish this, first gather up some slack and make it in the form of the loop (Fig. 58, XIV.); bend the loop back on itself (Fig. 58, XV.) and slip the weight through the double loop thus formed (Fig. 58, XVI.) ; draw tight by pulling the two. top lines, and the sinker hitch is finished (Fig. 58, XVII.).
The "fire-escape sling " previously mentioned, and illustrated by Fig. 57, E, is made with a double line.
Proceed at first as you would to make a simple bowline knot (Fig. 58, XVIII.).
After you have run the end loop up through the turn (Fig. 58, XIX.), bend it downward and over the bottom loop and turn, then up again until it is in the position shown in Fig. 58, XX.; pull it downward until the knot is tightened, as in Fig. 57, E, and it makes a safe sling in which to lower a person from any height. The longer loop serves for a seat, and the shorter one, coming under the arms, makes a rest for the back.
Fig. 58, XXI. is called a "boat knot," and is made with the aid of a stick. It is an excellent knot for holding weights which may want instant detachment. To detach it, lift the weight slightly and push out the stick, and instantly the knot is untied.
Fig. 58, XXII. Commencement of a "six-fold knot."
Fig, 58, XXIII. Six-fold knot completed by drawing the two ends with equal force. A knot drawn in this manner is said to be "nipped."
Fig. 58, XXIV. A simple hitch or " double " used in making loop knots.
Fig. 58, XXV. " Loop knot."
Fig. 58, XXVI. shows how the loop knot is commenced.
Fig. 58, XXVII. is the "Dutch double knot," sometimes called the "Flemish loop."
Fig. 58, XXVIII. shows a common "running knot."
Fig. 58, XXIX. A running knot with a check knot to hold.
Fig. 58, XXX. A running knot checked.
Fig. 58, XXXI. The right hand part of the rope shows how to make the double loop for the "twist knot." The left hand part of the same rope shows a finished twist knot. It is made by taking a half turn on both the right hand and left hand lines of the double loop, and passing the end through the "bight" (loop) so made.
Whip-Lashes.
Fig. 58, XXXII. is called the "chain knot," which is often used in braiding leather whip-lashes. To make a "chain knot," fasten one end of the thong or line; make a simple loop and pass it over the left hand; retain hold of the free end with the right hand; with the left hand seize the line above the right hand and draw a loop through the loop already formed; finish the knot by drawing it tight with the left hand. Repeat the operation until the braid is of the required length, then secure it by passing the free end through the last loop.
Fig. 58, XXXIII. shows a double chain knot.
Fig. 58, XXXIV. is a double chain knot pulled out. It shows how the free end is thrust through the last loop.
Fig. 58, XXXV. Knotted loop for end of rope, used to prevent the end of the rope from slipping, and for various other purposes.
Splices, Timber-Hitches, etc.
Although splices may not be as useful to boys as knots and hitches, for the benefit of those among my readers who are interested in the subject, I have introduced a few bands and splices on the cables partly surrounding Fig. 58.
Fig. 58, a. shows the knot and upper side of a "simple band."
Fig. 58, b. shows under side of the same.
Fig. 58, c and d. show a tie with cross ends. To hold the ends of the cords, a turn is taken under the strands.
Fig. 58, e and f. Bend with cross strands, one end looped over the other.
Fig. 58, g. shows the upper side of the "necklace tie."
Fig. 58, h. shows the underside of the same. The advantage of this tie is that the greater the strain on the cords, the tighter it draws the knot.
Fig. 58, i and j. are slight modifications of g and h.
Fig. 58, p. shows the first position of the end of the ropes for making the splice k. Untwist the strands and put the ends of two ropes together as close as possible, and place the strands of the one between the strands of the other alternately, so as to interlace, as in k. This splice should only be used when there is not time to make the "long splice," as the short one is not very strong.
From l to m is a long splice, made by under-laying the strands of each of the ropes joined about half the length of the splice, and putting each strand of the one between two of the other; q shows the strands arranged for the long splice.
Fig. 58, n. is a simple mode of making a hitch on a rope.
Fig. 58, o. is a " shroud knot."
Fig. 58, r. shows a very convenient way to make a handle on a rope, and is used upon large ropes when it is necessary for several persons to take hold to pull.

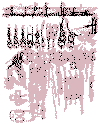
Fig. 59.
Timber Hitches, etc.
Fig. 59, A. Combination of half hitch and timber hitch.
Fig. 59, B. Ordinary half hitch.
Fig. 59, C. Ordinary timber hitch.
Fig. 59, D. Another timber hitch, called the "clove hitch."
Fig. 59, E. " Hammock hitch," used for binding bales of goods or cloth.
Fig. 59, F. "Lark-head knot," used by sailors and boat-men for mooring their crafts.
Fig. 59, P. shows a lark-head fastening to a running knot.
Fig. 59, G. is a double-looped lark-head.
Fig. 59, H. shows a double-looped lark-head knot fastened to the ring of a boat.
Fig. 59, I. is a "treble lark-head." To make it you must first tie a single lark-head, then divide the two heads and use each singly, as shown in the diagram.
Fig. 59, J. shows a simple boat knot with one turn.
Fig. 59, K. "Crossed running knot." It is a strong and handy tie, not as difficult to make as appears to be.
Fig. 59, L. is the bowline knot, described by the diagrams XII. and XIII. (Fig. 58, above). The free end of the knot is made fast by binding it to the "bight" or the loop. It makes a secure sling for a man to sit in at his work among the rigging.
Fig. 59, M, N, and 0. "Slip clinches," or "sailors' knots."
Fig. 59, Q. shows a rope fastened by the chain hitch. The knot at the left-hand end explains a simple way to prevent a rope from unraveling.
Fig. 59, R. A timber hitch; when tightened the line bind's around the timber so that it will not slip.
Fig. 59, S. Commencement of simple lashing knot.
Fig. 59, T. Simple lashing knot finished.
Fig. 59, U. "Infallible loop; " not properly a timber hitch, but useful in a variety of ways, and well adapted for use in archery.
Fig. 59, V. Same as R, reversed. It looks like it might give way under a heavy strain, but it will not.
Fig. 59, W. Running knot with two ends.
Fig. 59, X. Running knot with a check knot that can only he opened with a marline-spike.
Fig. 59, Y. A two-ended running knot with a check to the running loops. This knot can be untied by drawing both ends of the cord.
Fig. 59, Z. Running knot with two ends, fixed by a double Flemish knot. When you wish to encircle a timber with this tie, pass the ends, on which the check knot is to be, through the cords before they are drawn tight. This will require considerable practice.
Fig. 59, a. shows an ordinary twist knot.
Fig. 59, a'. shows the form of loop for builder's knot.
Fig. 59, b. Double twist knot.
Fig. 59, c. Builder's knot finished.
Fig. 59, d. represents a double builder's knot.
Fig. 59, e. " Weaver's knot," same as described under the head of Becket hitch (Fig. 57, V).
Fig. 59, f. Weaver's knot drawn tight.
Fig. 59, g. shows how to commence a reef knot. This is useful for small ropes; with ropes unequal in size the knot is likely to draw out of shape, as in.
Fig. 59, h. shows a reef knot completed. Of all knots, avoid the "granny;" it is next to useless under a strain, and marks the tier as a "landlubber."
Fig. 59, i. shows a granny knot; n. shows a granny under strain.
Fig. 59, j. shows the commencement of a common "rough knot."
Fig. 59, k. The front view of finished knot.
Fig, 59, l. The back view of finished knot. Although this knot will not untie nor slip, the rope is likely to part at one side if the strain is great. Awkward as it looks, this tie is very useful at times on account of the rapidity with which it can be made.
Fig. 59, o and p. Knot commenced and finished, used for the same purposes as the Flemish knot.
Fig. 59, q and q'. An ordinary knot with the ends used separately.
Fig. 59, s. Sheep-shank, or dog-shank as it is sometimes called, is very useful in shortening a line. Suppose, for instance, a swing is much longer than necessary, and you wish to shorten it without climbing aloft to do so; it can be done with a sheep-shank.
Fig. 59, r. shows the first position of the two loops. Take two half hitches, and you have a bend of the form shown by s. Pull tightly from above and below the shank, and you will find that the rope is shortened securely enough for ordinary strain.
Fig. 59, t. Shortening by loop and turns made where the end of the rope is free.
Fig. 59, u. A shortened knot that can be used when either end is free.
Fig. 59, v, w, and x. Shortening knots.
Fig. 59, y and z. A "true lover's knot," and the last one that you need to practice on, for one of these knots is as much as most persons can attend to, and ought to last a lifetime.
